Showing posts with label The Inn. Show all posts

Monday, January 24, 2011

A visit to Kristin Baybars shop

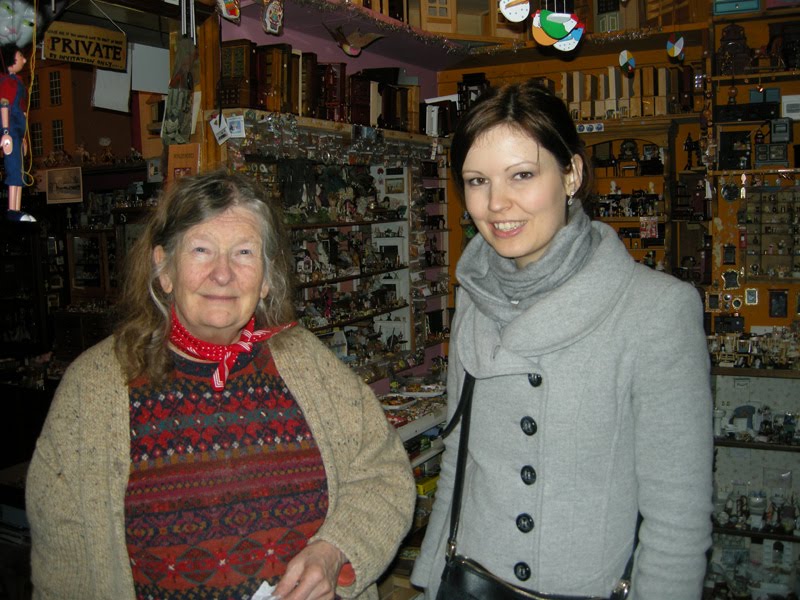
In the beginning of January I went to London, and of course I had to visit Kristin Baybars shop! She is such a lovely lady, and her shop is amazing!

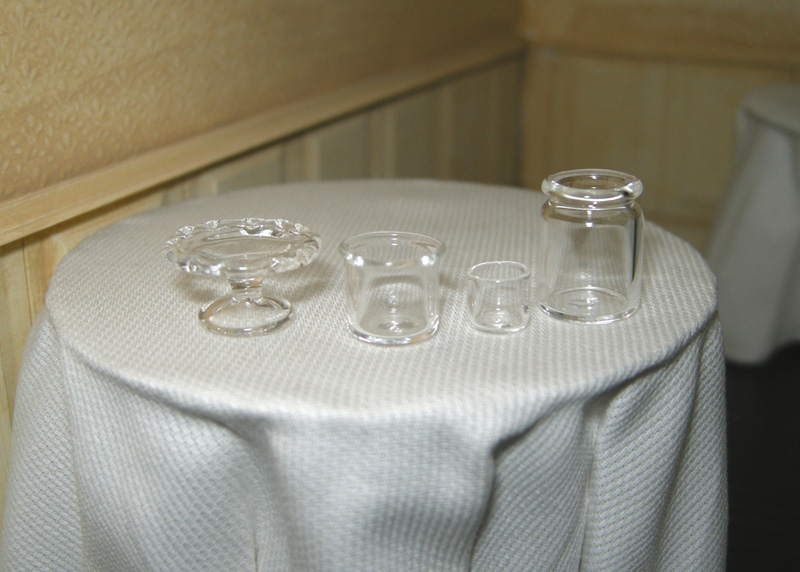
I bought some small glass items. I am planning to make some scented candles using the three jars.
I also got these urns. I have made lots of flowers, and I`m going to make flower arrangements in these for the diningroom at the Inn.

And I bought some lamps...

And the wizard got some new glass items for his potion making.

He also got a filled shelf for his bedroom.

I don`t know the maker of this chair, but it`s absolutely gorgeous! I put it in the Tuscan Villa.

This is piping for a sink I have, and a sweet picture.

Tuesday, August 24, 2010

Mini-baking

It`s been a while since I have made any minis from fimo, but here is my latest project. Some chocolate chip cookies. The "finished" cookies doesn`t look very edible though, I might have to make some new ones. I made the two-tier tray using plain metal plates, a long, thin nail (the kind used for earring making), and some beads. The baking board is a laminate sample, I got a whole bunch of these from Cocco.


Tuesday, June 22, 2010

June Dollhouse Club meeting

At our last meeting, Jane showed us how to make these cute parasols. :-)


Monday, May 24, 2010

Living room at the Inn

This is the living room at the Inn, where the guests can just hang out and relax. I made the fireplace, the chairs and sofa is by Lee`s Line, the table is Bespaq, the footstool is made by Janne, the pastries are made by Christel and the tea set bought in Thailand, was a gift from a friend.


Thursday, May 20, 2010

Kitchen at the Inn

This is the kitchen, and as every other room at the Inn, it`s not finished. But I thought I`d show you anyway! :-)


Thursday, May 13, 2010

The pink bathroom

This is the other bathroom at the Inn. It`s still missing some things before it`s done. I made the items on the shelf. The floor is wood, painted white, and the tiles inside the shower is a plastic tile sheet. I don`t remember where I bought the toilet and sink...


Tuesday, May 11, 2010

The blue bathroom

This bathroom is situated on the top floor at the Inn. It still needs a toilet, a mirror and some other bits and pieces. I had my eyes set on a modern toilet by Lenham Pottery, but they`re just too pricey... Maybe some other time ;-)
For the floor and stairs I used tiles by Richard Stacey that I painted white. I made the bathtub using paperclay inside a wooden shape/mould. I made the shelf for the sink using tiny ceramic tiles, and the sink is a kit from Elf Miniatures. I made the towels, the paper mug, the soap box and I painted the wooden bucket.


Monday, May 10, 2010

The fourth bedroom

I don`t know exactly what to call this bedroom... The inspiration was sort of Aladdin, the Middle East or North Africa. It`s one of the two Eastern bedrooms at the Inn. The bed is by Kelly Curtis, the wardrobe and chair is Bespaq. The tiles on the floor is by Richard Stacey.


Sunday, May 9, 2010

The English room


This is the English bedroom at the Inn. All of the furniture, except the crib, is by Bespaq. The bedspread is from Ann`s Crochet Miniatures, the pillows are by d.Anne Ruff, the items on the dresser to the right are made by me, and the hat box on the chair is by José Gomez.

Thursday, May 6, 2010

The French room

This is the French room at the Inn. The bed is by Kelly Curtis, the other furniture is Bespaq. I think the suitcase is by The Luggage Lady, but I`m not sure I remember correctly. The make-up bag on the night stand is made by Hild-Tove, and the cup is Re-ment. The rose on the bed is from SP Miniatures. All the other miniatures are made by me.


Enjoy your stay!

Tuesday, May 4, 2010

The Asian room

The Inn has four bedrooms, each with a different theme. Two of them represent the West, the English room and the French room, and two of them represent the East, the Asian room and the Middle Eastern room. Though I`m not quite sure if Middle Eastern is correct, but I`m thinking something colorful, inspired by Aladdin perhaps. This is the Asian room. Kelly Curtis made the lovely dressed bed. The other furniture is Bespaq, and the sword on the wall is by Nantasy Fantasy. One of the pillows on the couch is made by me, and the other one is made by Christel.


Monday, May 3, 2010

The reception desk at the Inn

This is the reception area at the Inn. I still need some more items for the shelves, and I`m looking for an open guestbook to put on the counter. Does anyone know someone who makes something like that?


I made the counter, the flowers, the magazine rack and the framed pictures. I bought the postcard rack from SP Miniatures
The sofa and plant stand is by Bespaq, and the umbrella stand is by Uncle Ciggie.
The other miniatures are from Delph Miniatures and Re-ment. The clock on the wall and the plate on the left side of the counter are gifts from two friends.


Sunday, April 25, 2010

Re-done living room at the Inn

This is one of the two living rooms at the Inn. I had painted the walls dark brown, and the plan was to add a lot of decorative mouldings, and make it sort of a Whitledge-Burgess inspired room. But I just never felt comfortable with the dark colors, and I couldn`t find furniture that looked right for this room.


So I decided to change it! I bought sheet panels for the walls from Northeasternscale Lumber, and painted them white. I made the chandelier, and the furniture is Bespaq. The room isn`t done yet, but I like it better so far! :-)


Thursday, April 8, 2010

A new sink

I bought the porcelain sink and faucet from Elf Miniatures as a kit, and I made the shelf using some tiny tiles that I glued on to a piece of wood. This is the bathroom on the top floor at the Inn. I have also made the bathtub (from paperclay) and the stairs around it.


Tuesday, March 30, 2010

Bespaq settee makeover

I bought this Bespaq settee several years ago, and never really found the perfect place for it. So I decided to give it a makeover.


I painted it black, varnished it, and re-upholstered it.

And now it will live happily ever after in the Asian room at the Inn. :-)

Monday, March 22, 2010

Framed photos

My husband took these pictures, minimized them for me and printed them out. I made the frames.


Wednesday, January 27, 2010

Scullery/kitchen

This is the room next to the kitchen in the Inn.


Sunday, January 3, 2010

Staircases of the Inn, part 2

The spindles and handrails are installed. As this was the first dollhouse I ever made, I didn`t excactly think everything through, so things doesn`t always fit perfectly in this house... The floor to ceiling height is also too low, and the doorways and staircases are too narrow. But I`ll make the best of it, and this house will always be special to me. Me and my father spent hours in their basement building it, and I am so glad he helped me.


Monday, December 28, 2009

The evolution of a dining room

The dining room in my first dollhouse has gone trough several changes over the years. This is what it looked like in the beginning, almost ten years ago now...


Then I decided to redecorate the house and turn it into an Inn. I sold almost every single piece of furniture and miniature I had in this house and started fresh.

I bought this scrapbooking paper to use as wallpaper, and I installed wooden flooring.


But I thought the wallpaper was too bright and shiny, and the dark Bespaq furniture was...well... too dark!
So I tried to age the walls with some paint, and I made some new tables. I`m not done with the table linen, but you get an idea of how it is going to look. I am going to decorate this room as if someone is having their wedding at the Inn.


Tuesday, December 22, 2009

Staircases of the Inn

I have turned my first dollhouse into an Inn, and as part of this redecoration project I have painted the stairs white. But painting spindels, handrails and newel posts white, for a house with four floors, is not the most tempting task. I have put it off for years now actually....


But it feels great to finally have done it! :-D
It was quite time consuming, I needed several layers of paint as they used to be dark brown. I`m looking forward to have everything glued in place!